Overview
The Belt Renderer allows you to generate a circumference Spline for the Loft Mesh of a Belt System using two Belt Rolls or more.
Where to find
Add a Belt Renderer to your scene by navigating to Standard Components > Belt System > Belt Renderer
It will automatically be attached to a selected GameObject. Otherwise it will create a new GameObject to attach to.
Feature Layout
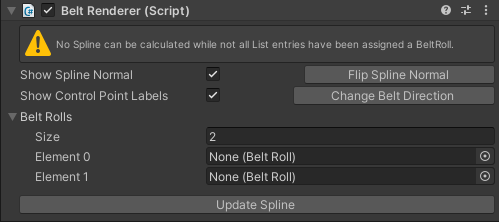
Belt Settings |
|
Show Spline Normal | Toggle to enable of disable the Spline normal. |
Flip Spline Normal | Flips the Spline normal between inside and outside the spline. |
Show Control Point Labels | Toggle to enable of disable the Spline Control Point Labels. |
Change Belt Direction | Changes the Belt direction for all assigned Belt Rolls. |
Belt Rolls | A list of all assigned Belt Rolls. |
Size | The number of Belt Rolls needed for generation of the Spline. |
Element [X] | Each individual assigned Belt Roll. |
How to use
1. Assign Belt Rolls.
The Belt Renderer needs at least two Belt Rolls to be able to generate a Spline .
Assign all Belt Rolls to the Belt Renderer. A Spline will automatically be generated if one can be calculated.
IMPORTANT: For Belt Rolls to be compatible with each other, they must all share the same Axis Direction and be in the same Plane.
2. (Re)position Belt Rolls if necessary
The generated Spline moves along with the Belt Rolls. If you need to adjust the position of the Belt Rolls or their radii, the Spline automatically updates.